Instructions for Face Front Picture
Providing us with these pictures will aid us in making sure that your new glasses are tailored precisely to your face. It is easiest to have someone assist you. Otherwise, use the self timer on your digital camera.
| 1. | Use your digital camera. Use the highest pixel setting. Do not use your webcam. | 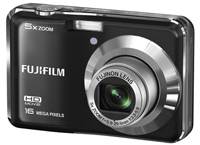 |
| 2. | Take a picture with flash. The flash will make two white dots appear in your pupils; this is the little channel in each pupil through which light reaches your retina. It is best to take the picture inside in a room that is not too brightly lit. Make sure you have the red eye prevention activated on your camera (a red eye will not show the white dots). Since a webcam does not have a flash, this will not work with a webcam. |  |
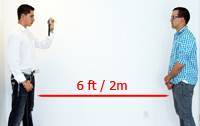
| 3. | With your side, line up against a wall. Make a little mark on the wall with tape, sticky note, pencil, etc., at your eye level. Then the person taking the picture will stand next to that and hold the camera at the level of the mark. You will stand opposite the person with your side lined up against the wall as well; lining up against a wall makes it easy to maintain the camera at the proper height and ensures you are looking straight at the camera. |  |
| 4. | The picture should be taken from a distance of about 2 meters (6 – 7 feet). Keep the camera lens level with the mark you made on the wall (thus at the height of the eyes). Important: Wear your current (or most comfortable) pair of glasses and keep your head in your normal, most comfortable position (most of us will tilt our heads slightly down in our normal posture, more so as we age). |
 |
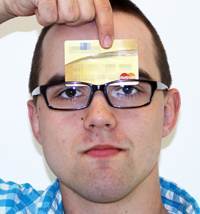
| 5. | Take a credit card, driver’s license, membership card or something else that is the same size as a credit card, and hold this against your forehead. We use the card as an important reference dimension, but cover part of the number if you plan on sending this picture to anyone. |
 |
| 6. | Focus your eyes on the camera. The person taking the picture should zoom in on your face. Snap the picture. The picture should look like the picture to the right. |
 |
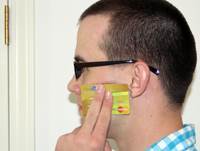
| 7. | Now, turn to the side, so that the camera shows your profile. Hold the card against your cheek. Take the picture. The picture should look like the one to the right.
|
 |
| 8. | Put the pictures on your computer. Upload them when you are prompted to do so during the check-out process. We will take care of everything else. |  |
Recommended for you


